
Beats over ear headphones have become iconic in the audio world, known for their distinctive style, impressive sound quality, and comfortable fit. Whether you own the Studio Pro, Solo 4, or another over-ear model, proper maintenance and usage are essential to ensure your premium headphones continue to deliver exceptional performance for years to come. This comprehensive guide covers everything from replacing worn ear pads to mastering the pairing process and optimizing charging practices.
The latest Beats over ear headphones lineup featuring Studio Pro and Solo models
Why Proper Maintenance Matters for Your Beats Headphones
Premium headphones represent a significant investment, and Beats over ear models are no exception. Regular maintenance not only preserves their appearance but also ensures optimal audio performance and comfort. Three key areas require particular attention: ear pad condition, proper pairing procedures, and charging habits. Let’s explore each of these aspects in detail to help you get the most from your Beats headphones.
Official Beats Support Resources
For official documentation and support directly from Beats, visit their support center for the most up-to-date information.Visit Beats Support Center
Replacing Beats Ear Pads: Step-by-Step Guide
Over time, the ear pads on your Beats over ear headphones will show signs of wear. Replacing them not only improves comfort but can also enhance sound isolation and overall audio quality. Here’s how to identify when replacement is needed and how to install new ear pads properly.
How to Identify When Beats Replacement Ear Pads Are Needed
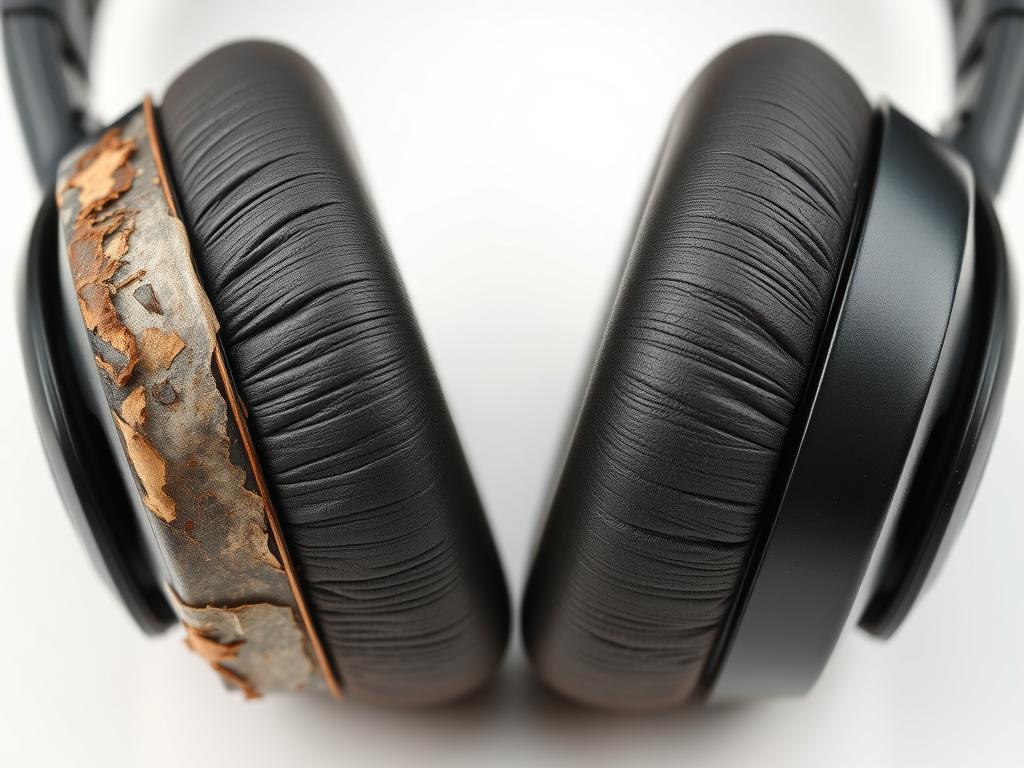
Signs of wear on Beats ear pads that indicate replacement is needed
Signs You Need New Ear Pads
- Cracking or peeling of the outer material
- Flattened cushioning that reduces comfort
- Deteriorating sound isolation
- Visible discoloration or staining
- Ear pads detaching from the mounting ring
Risks of Delaying Replacement
- Decreased comfort during extended listening
- Compromised sound quality and bass response
- Potential damage to the headphone speakers
- Hygiene issues from deteriorating materials
- Further damage to the mounting mechanism
Step-by-Step Ear Pad Replacement Process
Prepare your workspace – Find a clean, well-lit area and gather your replacement ear pads.Remove the old ear pads – Gently grip the edge of the ear pad and slowly pull outward, rotating around the circumference until it detaches completely.Clean the mounting surface – Use a slightly damp microfiber cloth to remove any debris or adhesive residue from the mounting ring.Align the new ear pad – Position the replacement pad with its mounting tab aligned with the notch on the headphone.Secure the new ear pad – Press the edge of the pad into the groove of the mounting ring, working your way around the circumference until fully secured.Verify the installation – Ensure the pad is evenly seated with no gaps or bulges around the perimeter.
Visual guide to replacing ear pads on Beats Studio Pro headphones
Recommended Cleaning Methods for Beats Ear Pads
Regular cleaning can extend the life of your ear pads and maintain hygiene. For light cleaning of attached ear pads:Use a slightly damp microfiber cloth with a small amount of mild soapGently wipe the surface without saturating the materialAllow to air dry completely before using the headphonesFor protein leather pads, apply a small amount of leather conditioner every few monthsNever use alcohol-based cleaners as they can damage the material
Official Beats Replacement Ear Pads
For the best fit and quality, we recommend purchasing genuine Beats replacement ear pads that are specifically designed for your headphone model.Shop Official Ear Pads
How to Pair Beats Headphones with Different Devices
Properly pairing your Beats over ear headphones ensures optimal connectivity and access to all features. The process varies slightly depending on whether you’re connecting to iOS, Android, or Windows devices.
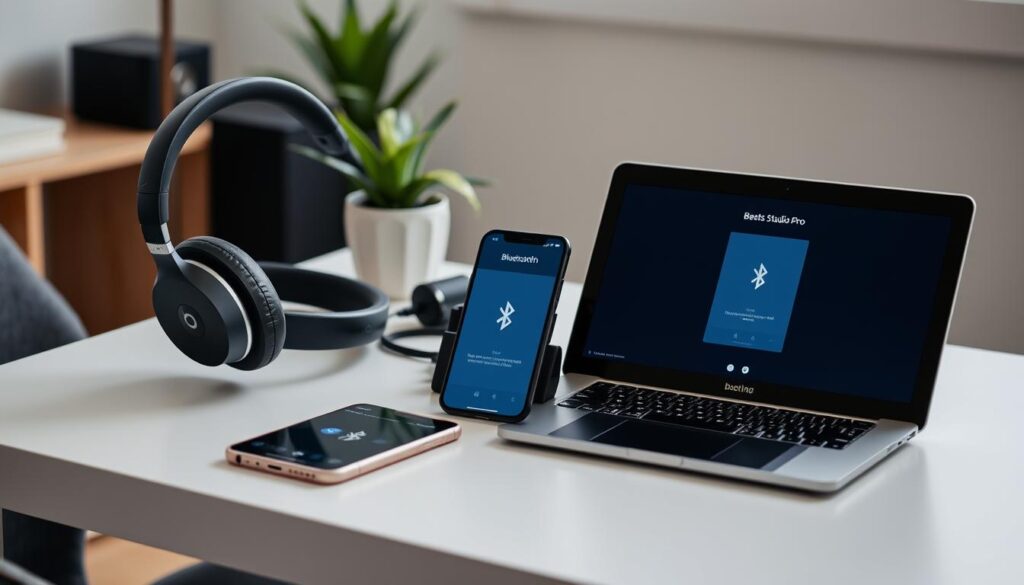
Pairing Beats headphones with multiple device types
Pairing Beats Headphones with iOS Devices
Beats headphones offer enhanced functionality with Apple devices thanks to the integrated Apple W1 or H1 chip in many models.Power on your Beats headphones – Press and hold the power button for 1-2 seconds until the LED indicator lights up.Enter pairing mode – Continue holding the power button for 5 seconds until the LED indicator flashes.On your iOS device – Unlock your iPhone or iPad and bring it close to your headphones.Wait for the connection prompt – A pairing animation should appear on your iOS device screen.Tap “Connect” – Your Beats headphones will now pair and connect to your device.Verify connection – Check that your headphones appear in the Bluetooth devices list in Settings.
Pro Tip: Once paired with one Apple device, your Beats headphones will automatically be available on all your other Apple devices signed into the same iCloud account. Look for them in the Bluetooth menu or Control Center of your other devices.
Pairing Beats Headphones with Android Devices
Recent Beats models offer improved Android compatibility with features like Fast Pair support.Power on your Beats headphones – Press and hold the power button until the LED indicator lights up.Enter pairing mode – Continue holding the power button for 5 seconds until the LED indicator flashes.On your Android device – Open Settings and navigate to “Connected devices” or “Bluetooth”.Tap “Pair new device” – Your Android device will scan for available Bluetooth devices.Select your Beats headphones – Tap on the name of your Beats model when it appears in the list.Confirm pairing – If prompted, confirm the pairing request on both devices.
Android Fast Pair: Many newer Beats models support Google Fast Pair. When your headphones are in pairing mode near your Android device, you’ll see a notification prompt to connect quickly.
Pairing Beats Headphones with Windows PCs
Power on your Beats headphones – Press and hold the power button until the LED indicator lights up.Enter pairing mode – Continue holding the power button for 5 seconds until the LED indicator flashes.On your Windows PC – Click the Start menu, then select Settings > Devices > Bluetooth & other devices.Turn on Bluetooth – Ensure the Bluetooth toggle is switched to “On”.Click “Add Bluetooth or other device” – Then select “Bluetooth” from the options.Select your Beats headphones – Click on your Beats model when it appears in the list of available devices.Follow any additional prompts – Complete the pairing process as directed.
Troubleshooting Common Pairing Issues
Why won’t my Beats headphones enter pairing mode?
If your headphones won’t enter pairing mode, try resetting them. Press and hold both the power button and volume down button simultaneously for 10 seconds until the LED indicator flashes. This will reset the headphones to factory settings and clear all paired devices.
My device can’t find my Beats headphones during pairing
Ensure your headphones are in pairing mode (LED flashing). If they still aren’t detected, try turning Bluetooth off and on again on your device, or restart both your device and headphones. Also, make sure your headphones are charged.
My Beats headphones connect but there’s no sound
Check that your headphones are selected as the audio output device. On most devices, you can select the audio output in the sound or Bluetooth settings. Also, ensure the volume is turned up on both your device and the headphones.
Official Beats Pairing Guide
For model-specific pairing instructions and troubleshooting, download the official Beats pairing guide.Download Pairing Guide
Beats Charger Types and Charging Best Practices
Proper charging habits can significantly extend the battery life of your Beats over ear headphones. Understanding your specific model’s charging requirements and implementing best practices will ensure optimal performance.
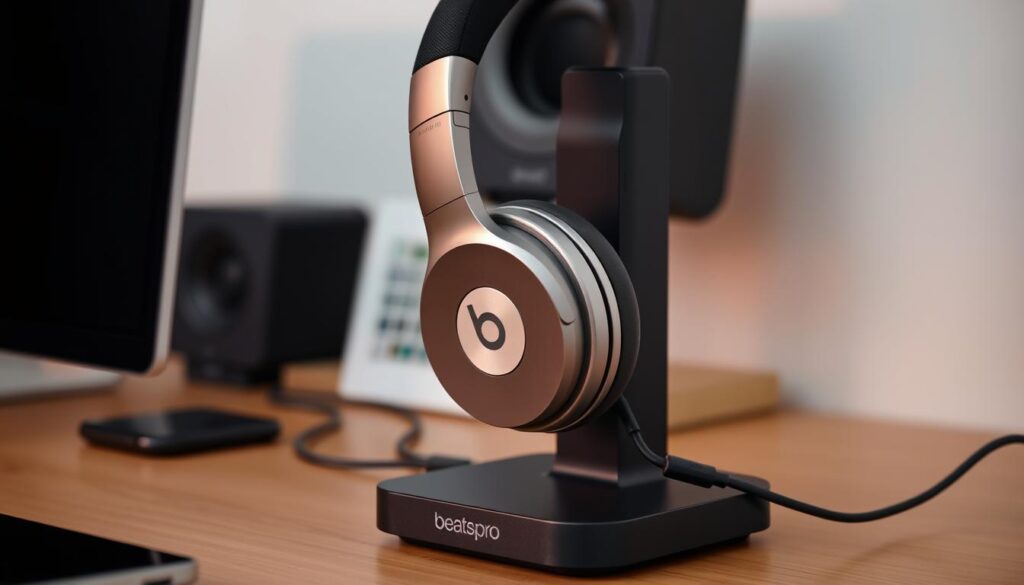
Beats Studio Pro headphones with USB-C charging connection
Understanding Beats Charger Types
Modern Beats over ear headphones typically use one of two charging connector types:
USB-C Charging
Newer Beats models like the Studio Pro and Solo 4 use USB-C charging ports. These offer faster charging speeds and greater compatibility with modern devices.
Micro-USB Charging
Older Beats models use Micro-USB ports for charging. While less common in newer models, many existing headphones still utilize this connection type.
Important: Always use the charging cable that came with your Beats headphones or a high-quality certified replacement. Low-quality cables can damage the battery or charging port and may pose safety risks.
How to Check Battery Status on Beats Headphones
Knowing your current battery level helps prevent unexpected power loss during use:LED Indicators – Most Beats headphones have LED indicators that show battery status when powered on. Typically, white lights indicate remaining charge level.iOS Battery Widget – On iPhones and iPads, add the Batteries widget to your home screen to see the exact battery percentage of connected Beats headphones.Android Battery Level – On Android devices, the battery level often appears next to the Bluetooth connection in the pull-down menu or Bluetooth settings.Voice Prompts – Some Beats models announce battery level when powered on or when prompted via controls.Beats App – The Beats app for iOS and Android can display detailed battery information for connected headphones.
Charging Best Practices for Maximum Battery Lifespan
Proper charging setup for Beats over ear headphones
Do’s
Charge your headphones before they’re completely drainedUse the original charging cable or certified replacementsCharge at room temperature (20-25°C/68-77°F)Allow proper ventilation during chargingDisconnect once fully charged for long-term storageUse Fast Fuel charging when you need quick power
Don’ts
Avoid charging in extremely hot or cold environmentsDon’t use damaged cables or chargersAvoid covering headphones while chargingDon’t leave continuously charging for daysAvoid completely draining the battery regularlyDon’t use uncertified fast chargers
Fast Fuel Charging Explained
Many Beats over ear headphones feature Fast Fuel technology, which provides several hours of playback from just a few minutes of charging:
| Beats Model | Fast Fuel Charging Time | Playback Time Gained | Connector Type |
| Studio Pro | 10 minutes | 4 hours | USB-C |
| Solo 4 | 10 minutes | 5 hours | USB-C |
| Studio 3 | 10 minutes | 3 hours | Micro-USB |
| Solo 3 | 5 minutes | 3 hours | Micro-USB |
How long do Beats headphones take to charge fully?
Most Beats over ear headphones take approximately 1.5 to 2 hours to charge completely from empty. The Studio Pro takes about 1.8 hours, while the Solo 4 takes approximately 1.5 hours for a full charge.
Can I use my Beats headphones while charging?
Most Beats over ear models cannot be used while charging. This is a safety feature and also helps preserve battery health. However, many models support wired listening via the 3.5mm audio cable even when the battery is depleted.
How can I tell when my Beats headphones are fully charged?
When your Beats headphones are fully charged, the LED indicator will typically show a solid white light or all five lights will be illuminated (depending on your model). Refer to your specific model’s user guide for exact indicator patterns.
Official Beats Charging Accessories
Ensure optimal charging performance with official Beats charging cables and adapters designed specifically for your headphones.Shop Charging Accessories
Additional Maintenance Tips for Beats Over Ear Headphones
Beyond ear pad replacement, pairing, and charging, there are several other maintenance practices that can help extend the life of your Beats headphones.
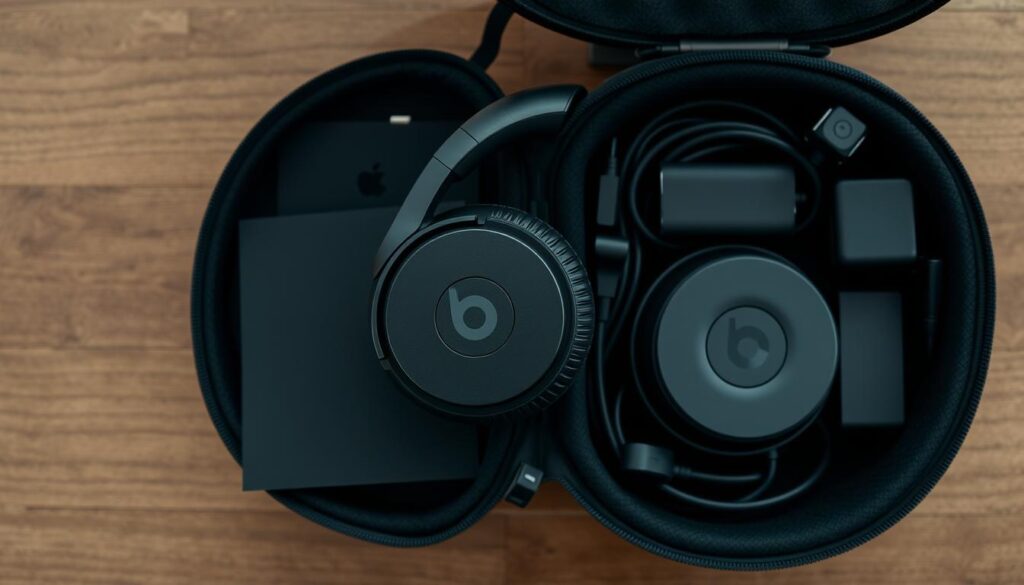
Proper storage of Beats headphones in protective case
Proper Storage and Handling
Always store your headphones in their protective case when not in useFold the headphones according to their designed folding mechanismKeep headphones away from extreme temperatures and direct sunlightAvoid exposing headphones to moisture or high humidityHandle the headband with care to prevent stretching or warpingKeep cables neatly coiled to prevent damage and tangling
Cleaning the Headband and Exterior
Regular cleaning helps maintain the appearance and hygiene of your headphones:Power off and disconnect – Ensure your headphones are turned off and disconnected from all devices.Prepare cleaning materials – Use a slightly damp microfiber cloth and, if necessary, a small amount of mild soap.Wipe exterior surfaces – Gently clean the headband, ear cups, and other exterior surfaces.Clean crevices and buttons – Use a dry, soft-bristled brush (like a clean toothbrush) to remove debris from buttons and seams.Dry thoroughly – Allow the headphones to air dry completely before using or storing them.
Caution: Never use alcohol, solvents, or abrasive cleaning products on your Beats headphones as these can damage the finish and materials. Also, avoid getting moisture near the speaker elements or electronic components.
Firmware Updates
Keeping your Beats headphones’ firmware updated ensures optimal performance and access to the latest features:For iOS users, firmware updates typically happen automatically when connected to your deviceAndroid users should download the Beats app from the Google Play Store to check for and install updatesWindows and Mac users can check for updates through the Beats Updater applicationEnsure your headphones are charged at least 50% before initiating a firmware updateDo not disconnect or power off your headphones during the update process
Beats app firmware update interface
Extending the Life of Your Beats Over Ear Headphones
By following the maintenance, pairing, and charging practices outlined in this guide, you can significantly extend the lifespan of your Beats over ear headphones while ensuring optimal performance and comfort. Regular care not only preserves your investment but also maintains the premium audio experience that Beats headphones are known for.
Key Takeaways
- Replace ear pads when they show signs of wear to maintain comfort and sound quality
- Follow proper pairing procedures for your specific device to ensure stable connectivity
- Use appropriate charging cables and follow best practices to maximize battery lifespan
- Store headphones properly in their protective case when not in use
- Clean regularly but gently, avoiding harsh chemicals and excessive moisture
- Keep firmware updated to access the latest features and improvements
Official Beats Support
For additional assistance with your Beats over ear headphones, contact official Beats support for personalized help.Contact Beats Support
“Quality headphones deserve quality care. With proper maintenance, your Beats over ear headphones can deliver exceptional sound and comfort for many years to come.”
– Beats Audio Team
Frequently Asked Questions
How often should I replace the ear pads on my Beats headphones?
The frequency of ear pad replacement depends on usage patterns, but typically, ear pads should be replaced every 12-18 months with regular use. Signs that replacement is needed include cracking, peeling, flattening of the cushioning, or decreased comfort during wear.
Can I pair my Beats headphones with multiple devices simultaneously?
Most Beats over ear headphones can be paired with multiple devices but can only maintain an active connection with one device at a time. However, newer models with the Apple H1 chip support seamless switching between Apple devices signed into the same iCloud account.
What should I do if my Beats headphones won’t charge?
If your Beats headphones won’t charge, try these troubleshooting steps: 1) Try a different charging cable, 2) Clean the charging port gently with a dry toothpick or compressed air, 3) Use a different power source, 4) Reset the headphones by holding the power and volume down buttons for 10 seconds, 5) If none of these work, contact Beats support as there may be a hardware issue.
How can I improve the battery life of my Beats headphones?
To maximize battery life, turn off active noise cancellation when not needed, reduce volume levels (higher volume drains battery faster), turn off headphones when not in use, keep firmware updated, avoid extreme temperatures, and use wired mode when possible to preserve battery charge.
Are third-party ear pads compatible with Beats headphones?
While third-party ear pads are available for Beats headphones, they may not match the exact specifications of official replacements. Third-party options may affect sound quality, noise isolation, and comfort. For optimal performance, official Beats replacement ear pads are recommended, though they typically cost more than third-party alternatives.